

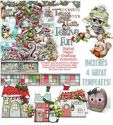
I used the Owl Bag templates from the Twiggy & Tots Festive Fun Download which is also available as a CD if you prefer. The CD has lots of gorgeous Christmas papers, digi stamps and coloured images as well as many other fab items. The owl bag also comes as a SVG file for those with cutting machines. I really couldn't resist this owl and although it comes as a SVG cut file I decided to use the PDF format so I could create a matching card blank. (Please see my step by step instructions below). The PDF comes with full colour picture instructions to make the bag which are very easy to follow.

This project comes with the items ready to cut out but I wanted to change some of the papers to co-ordinate with the Autumn colours for this challenge. The papers used for the other layers are also from the Twiggy & Tots CD.
I have also entered this card and bag in the following challenges:
* Bling - Love To Scrap, Crafty Calendar Challenge,
* Favourite hobby (making gifts for others) - As You Like It,
* Anything Goes - 613 Avenue Create, Craft Your Passions,
* Use some red - Glitter 'n' Sparkle,
* Lots of Layers - Whoopsi Daisy,
Please come over and enter the challenge :)
 |  |  |  |

Instructions for making the PDF into a card shape:
1. I took the PDF and cut out the owl bag shape and laid it on top of an 8 x 8 inch card blank and leaving the fold intact drew around it.

2. I then took this template and cut out the pieces for the bag as well as one extra, remembering to flip one for the back of the box as the kraft card I was using had a different colour on the reverse. I then labelled this piece in pencil.

3. I then stuck one of the front pieces to the card blank to cover the missing fold piece. I continued to cut out the strips for the bag handle and container sections. Once I had cut these out I used them as templates to transfer the design onto the kraft card. I found it easier to cut the zig zag parts into strips first then draw in the the zig zags and cut them out using a craft knife.

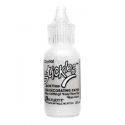
4. I then stuck the two zig zag sections together and added them to the back of the box with Cosmic Shimmer glue and held them for a few seconds to bind.

5. I then added the front section which I found easiest to do while holding it to the table upright. This meant I could make sure the bag would stand up flat. I then cut out all the patterned sections from the PDF as well as the beak. I also changed some of these papers by drawing around them onto different patterned papers. For the eyes I used Spellbinders circles to cut out the white circles and the eye balls out of glitter cardstock (for added sparkle). Once I had cut out all the sections I used a brown micron pen to add faux stitching.

6. I then assembled all the pieces on both the card and bag and added glitter glue, jewels and a bow :).
xx Mia xx
16 comments:
Beautiful card, lovely post and welcome to the team ((hugs))
xx
Wonderful - love that you made a card too and great tutorial! Welcome to the Polkadoodles team :-)
Adorable project...this is a must make from this collection. great tutorial as well.
What a great post, loving seeing your step by step, so interestng to see how you pulled it all together! Welcome to Polkadoodles so great to have such a talented lady with us xx
Brilliant post and love how you explained beautifully how to make the bag. Great to have you aboard and welcome to the Polka Doodles family. Lou x
Welcome to team Polkadoodles. Fantastic make and detailed description too. Looking forward to getting to know you Hun x
Thanks for the lovely comments ladies it's great to be part of the Polkadoodles team :)
So cute! Thanks for sharing the details and for dropping by 613 Avenue Create.
A lovely project. Thanks for joining AYLI challenge. Elaine
Such a delightful pair of owls! Thanks for sharing your creativity at Crafty Calendar this month.
Chris
x
ADORABLE! I love how the templates, .pdf, AND .svg's are all included in the Polkadoodle collections!!!
Awww . . . they're so cute!! And how fun to have a matching bag AND card. Thanks for playing with LTSCB. (sorry I'm late in commenting!)
Lovely project thank you for joining us at Whoopsie Daisy Challenge hugs Sue DT xx
Super cute love the mini tutorial too! Thanks for joining in with our challenge at As You Like It, hugs Samantha :0)
Do forgive me Mia for being so late with my commenting. Welcome aboard the Polkadoodle train. What a fab tutorial. Great job!
Lovely work. Thank you for joining the challenge at Whoopsi Daisy. Hope to see you again next time.
Post a Comment